Count how many times you have used the jetted tub in the last twelve months. For most homeowners we meet, the honest answer is somewhere between zero and three, and two of those were to bathe a dog. Meanwhile that tub is eating 25 square feet of your primary bathroom, sitting in a tiled deck that collects dust, next to a shower barely wide enough to turn around in. The walk-in shower ideas below all start from the same premise: that footprint is the most underused real estate in the house.
Jacuzzi tubs were the status feature of 1990s and early-2000s construction. Drive through Circle C, Steiner Ranch, Avery Ranch, or half of Round Rock and you will find the same corner drop-in unit repeated across thousands of floor plans.
They have not aged well, and not just stylistically.
A jetted tub carries a pump motor, an access panel, a dedicated GFCI circuit, and roughly 20 feet of internal plumbing lines that never fully drain. Those lines are where biofilm accumulates, which is why so many of these units get filled, run once, and then abandoned. Add the 60 to 80 gallons of hot water a proper soak demands and the whole fixture becomes something you look at rather than use.
Why Are Homeowners Replacing Jacuzzi Tubs With Walk-In Showers?
Homeowners replace jetted tubs with walk-in showers because the shower gets used every single day and the tub does not. In a primary bathroom remodel, converting that tub deck typically returns 20 to 30 square feet of usable floor area without touching a single exterior wall.
The reasons stack up quickly once you look at the fixture honestly:
- Daily use versus occasional use. A 42-inch shower you squeeze into every morning is a worse investment than a 60-inch shower you enjoy, no matter what the tub adds on paper.
- Maintenance load. Tub decks crack at the grout joints, the surround tile fails at the horizontal surface, and jetted plumbing needs periodic sanitizing cycles almost nobody runs.
- Aging in place. Stepping over a 20-inch tub wall gets harder every decade. A curbless or low-threshold shower removes that risk permanently.
- Resale reality. Buyers touring an Austin home in 2026 respond to a large tiled shower far more predictably than to a dated whirlpool unit in almond acrylic.
- Water and energy. A soak burns 60 to 80 gallons. A 10-minute shower with a WaterSense fixture uses roughly 18.
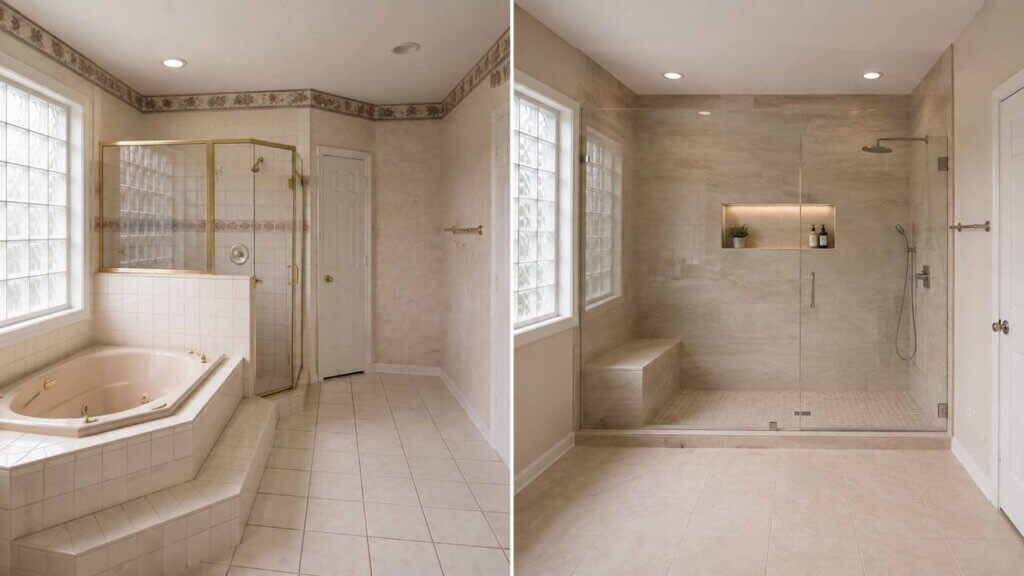
1. The Curbless Wet Room
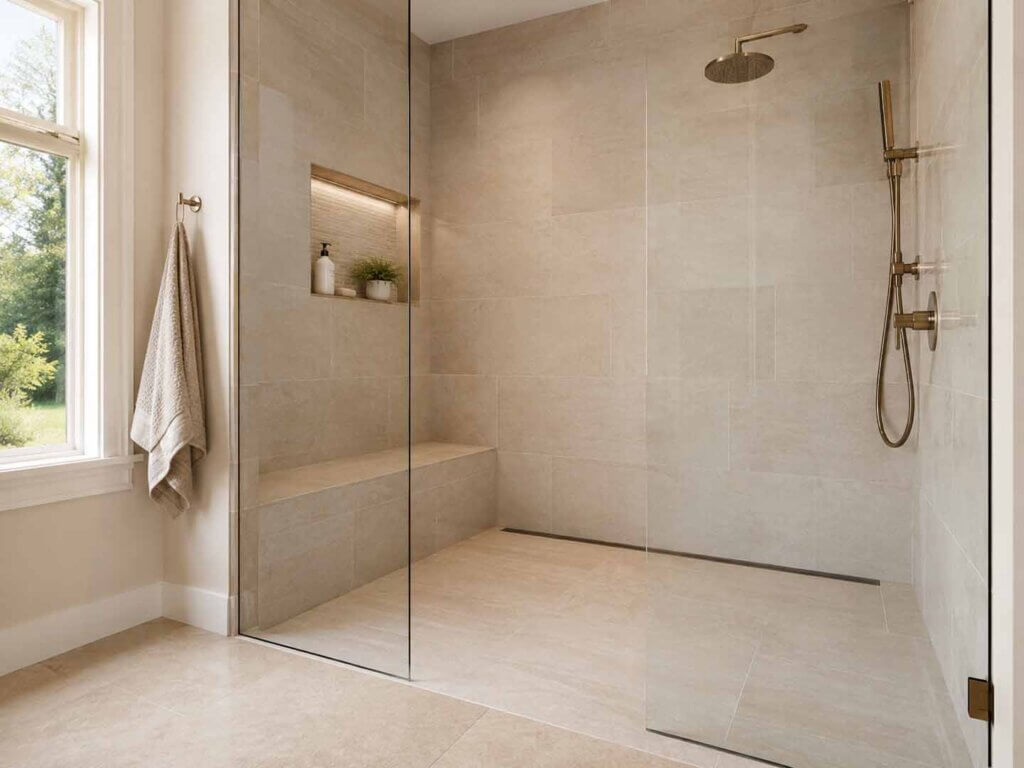
A curbless shower eliminates the threshold entirely, so the bathroom floor runs continuously into the shower with no lip to step over. It is the single most requested conversion we handle, and the most technically demanding.
The floor inside the shower has to slope at roughly 1/4 inch per foot toward the drain, which means the subfloor or slab has to drop to accommodate it. In a slab-on-grade home, that usually means recessing the concrete or building the entire bathroom floor up to meet the new plane. A linear drain against the back wall simplifies the geometry considerably, because the tile only pitches in one direction instead of four.
Budget more for the substrate work than the finishes here. The tile is the easy part.
2. The Doorless Walk-Through With a Return Wall
Skip the glass door and let a partial return wall contain the spray. The layout works when you have enough length to place the showerhead 4 to 5 feet away from the opening, which the old tub-plus-shower footprint often provides once the dividing wall comes out.
No hinges. No glass to squeegee. No door swinging into the vanity.
The tradeoff is heat. An open shower loses steam continuously, so pair it with a thermostatic valve and consider a radiant floor mat if you want the space comfortable in January.
3. Frameless Glass in the Tub’s Old Footprint
The most direct conversion: demolish the tub deck, extend the existing shower into that space, and wrap it in 3/8-inch frameless tempered glass. You end up with a shower running 60 to 72 inches long instead of 36, and the visual weight of the room drops noticeably because clear glass reads as open space.
Specify low-iron glass if you have chosen white or pale tile. Standard tempered glass carries a green tint at the edges that will shift the color of everything behind it, and homeowners notice it immediately after installation, which is the worst possible time.
4. A Bench and Niche Sized for Real Use
Most built-in benches are too small. A bench should measure at least 15 inches deep and sit 17 to 19 inches off the finished floor, matching standard seat height, or it becomes a shelf for shampoo instead of a place to sit and shave.
The same logic applies to niches. Frame them between studs at a height that clears the tallest bottle you actually own, slope the bottom surface slightly toward the shower so water drains out, and use a single slab or a full tile piece for that base rather than a grout joint that will fail.
5. The Double Shower With Two Zones
Two showerheads on opposite walls, two controls, one enclosure. In a primary bathroom where two people are getting ready at 6:45 a.m., this solves a genuine daily conflict rather than a hypothetical one.
Plan for the water supply before you fall in love with the idea. Two 2.5 GPM heads running simultaneously will outrun a 40-gallon tank water heater within minutes, which is why these conversions frequently pair with a tankless upgrade or a larger tank, and that mechanical work belongs in the budget from day one.
6. The Wet Room Hybrid With a Freestanding Tub
If you genuinely want to keep a tub, put it inside the shower zone instead of beside it. A glassed wet room holding both a freestanding soaking tub and a shower area consolidates all the waterproofing into one contained space and frees the rest of the bathroom for a longer vanity or a linen tower.
This works best in primary bathrooms with 9 feet or more of clear wall. A freestanding tub needs 4 to 6 inches of clearance behind it for cleaning, and the filler needs either a floor-mount supply through the slab or a wall-mount valve, both of which are decisions to make during rough-in.
7. The Steam Shower Conversion
A steam shower turns the enclosure into a functional replacement for the relaxation the jetted tub was supposed to provide. That is the argument for it, and it is a fair one.
The requirements are strict. The enclosure has to be vapor-tight from floor to ceiling, the ceiling should slope roughly 2 inches per foot so condensate runs down the walls instead of dripping, the glass has to run full height with a sealed transom, and the generator needs a dedicated circuit plus an accessible location within a reasonable pipe run. Porous stone is a poor choice inside a steam enclosure because vapor migrates into anything permeable.
8. Large-Format Porcelain Slab Walls
Grout is what people hate about showers, so remove most of it. Large-format porcelain panels, some running 5 by 10 feet, cover an entire shower wall with two or three seams total instead of two hundred linear feet of grout joint.
Maintenance drops dramatically. So does the visual busyness, which matters in a bathroom where the tile is now covering a much larger area than it did before the conversion.
Installation demands a dead-flat substrate and a crew with the right suction rig and blades. This is not a material to hand to a general handyman.
9. The Accessible Shower Built for the Next 25 Years
An accessible walk-in shower uses a zero or low threshold, a 36-inch clear entry, a handheld on a slide bar, a folding or built-in seat, and blocking behind the walls for grab bars.
Here is the detail worth insisting on even if you are 45 and healthy: install the plywood blocking now. It costs almost nothing during framing and it means grab bars can be added later, anywhere along that wall, without opening tile. Retrofitting blocking into a finished shower means demolition.
Slip resistance matters too. For shower floors, specify a mosaic or textured porcelain with a wet dynamic coefficient of friction of 0.42 or higher, which is the threshold the industry uses for level interior spaces expected to be walked on wet.
What Does It Cost to Replace a Jacuzzi Tub With a Walk-In Shower?
In the Austin market, a straightforward tub-to-shower conversion generally runs from about $9,000 to $18,000, while a full primary bathroom remodel built around a curbless wet room commonly lands between $25,000 and $60,000 depending on tile selection, glass, and how far the plumbing moves. Scope drives the number far more than finish choices do.
Plumbing, Permits, and Austin Slab Foundations
The drain location is the pivot point of the entire budget. If the new shower drain sits within a couple of feet of the old tub drain, the work stays simple. If you are converting to a linear drain along a different wall, or you have chosen a curbless design in a home built on a post-tension slab, the crew has to saw-cut and trench concrete, reroute the waste line, then patch and re-level.
That work also triggers plumbing and often electrical permits. Removing a jetted tub means abandoning its dedicated circuit properly, not just capping wires behind drywall. The City of Austin’s Development Services permitting resourcesoutline which trade permits and inspections apply to a bathroom scope of this kind.
Waterproofing Is Where Most Walk-In Shower Ideas Fail
Every design above depends on one thing the homeowner never sees. A shower pan and walls must be waterproofed with a system tested to ANSI A118.10, installed per the manufacturer’s instructions as a complete assembly rather than mixed across brands, and flood-tested before a single tile goes on.
Cement board alone is not waterproof. It is a substrate, and treating it as a barrier is the reason so many 2000s-era showers are rotting behind the tile right now.
When the shower goes curbless, the stakes climb, because there is no threshold acting as a last line of defense. The waterproofing membrane has to extend well beyond the shower zone into the surrounding floor. That is also why we carry a 5-year waterproofing warranty on our bathroom work alongside a 2-year plumbing warranty: the system either performs or it does not, and the failure shows up in the ceiling below.
Should You Keep One Tub in the House?
Usually, yes, and this is where we push back on clients. If the primary bathroom is the only full bath with a tub and the home has three or more bedrooms, converting it can narrow your buyer pool later, since families with small children look for at least one bathing option.
Keep a tub in a secondary or hall bathroom and the objection disappears entirely. Then the primary bath is free to become exactly the shower you want.
Turning These Walk-In Shower Ideas Into a Real Plan
The best walk-in shower ideas are the ones your bathroom can physically support. A curbless wet room in a slab home with the drain on the wrong wall is a different project than a frameless enclosure that reuses existing rough-in, and the difference shows up in both the schedule and the invoice.
Most bathroom remodels in our shop run 4 to 8 weeks, with simple refreshes closing in 2 to 3 and larger primary suites taking 8 to 10. Waterproofing cure times and glass fabrication lead times, typically 2 to 3 weeks after the tile is finished and templated, set the floor on that schedule no matter how fast the crew works.
Want to see the materials before you commit? Visit our studio at 6000 S Congress Ave to compare porcelain slab, tile, and fixture finishes under real light with a designer walking you through the options.
When you are ready for a number tied to your actual bathroom, schedule a free bathroom remodel consultation and we will measure the space, locate the existing drain and framing, and tell you which of these conversions your home supports before you spend anything. You can also browse our completed bathroom projects to see how these conversions look finished, and ask about financing terms from 12 to 60 months if timing is the constraint.
Call (833) 383-2289 or request your free estimate online.